Deconstruction progress pt. 2


This week I continued to model the Bic Lighter.

I found some exploded diagrams on the lighter to find some of the elements I may have forgotten and better understand the shapes I am trying to create.

I then got to recreating the plastic holders that protrude from the casing though I am unsure how to curve them to fit the oval shape of the casing. Tracing a horizontal image using the picture frame command and the poly line tool and control point curve tools.


Later I found there is a cap on the bottom of the lighter used to trap the gas so i began doing this simple model.

 extruded and caped oval

complete with the gas cap nub
Now back to the jet valve that i wasn't very satisfied with


tracing the outline of the jet valve I was able to better recreate the form. once I revolved a single side.


 Here i'm inserting a cylinder to Boolean subtract  and create a proper valve 

 yay.


I decided I should also model the child lock found on new lighters 


I began creating the shape with use of the control point curve tool to approximate the shape.


Then curve extruded the shape 

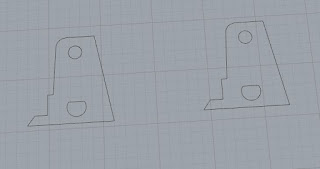
I still have quite a bit of work ahead and I am still very confused as to how to recreate the "hood" (large hollow metal piece where the flame exits) and same for the oddly shaped "fork" though i have created a 2D outline of it 
(pictured below).
Close up of hood piece 

side view of  "fork"
"fork" 2d

 Finally I need to have everything measuring the proper dimensions in rhino. 
Well... time to get back to work 😵.

Comments

Popular posts from this blog

Breakfast Fabrication: Modelling

For our fabrication test me and Nancy first began to look at how we could create a mold from the foam to be used for glass casting as we are both involved in glass making at ACAD, Nancy in hot glass and me in glass casting. We then decide to play with the idea of creating food out of glass and settled with the food item of the waffle. we decided contemplated over square or round waffle ideas Here is a diagram of the waffle and all the accessories we plan to add onto the available space not covered by the waffle for the CNC template. Here we created the waffle model by rounding the corners of squares then lofting the squares to create a more organic real waffle look To create the blueberry we took a sphere then Boolean differenced to with a extruded star + added a small inner sphere. For the strawberry we revolved  a half strawberry silhouette creating a heart like shape, then a half strawberry.  ...

Ice Glasses: Concept Generation

 Two weeks ago we discussed our eye wear thumbnails and oddly enough the idea that got unanimous approval was my throwaway idea of ice cube glasses (#2) . In the discussion Bryan liked the car glass (#6.) which I was originally planning on taking to the second phase and may still do so in the future. Though the comments on my ice glasses had me reflect on this interesting concept of glasses as a preformative art piece that also play into the design of sunglasses, though in this case protecting one face from the heat of the sun rather than from it's UV rays. So to create these glasses i would need to make a rubber mold much like an ice cube tray that could be filled with water and frozen in a freezer or possibly dry ice because there is no freezer i know of at ACAD and i'm not sure if it would survive a cooler trip from home. I started thinking about how these things would realistically look like inspired by the classic aviator design with a large nose bridge t...

Cool Glasses: Environmental Eyewear + Measurements

I began rethinking my eye-wear as I didn't really feel comfortable with the strength of my concept and decided it to tie in the concept with my research on the human perception of place and environmentalism. From that I came to the idea of representing our melting polar ice caps as glasses as ice masses that protect the planet from the suns rays using the white colour of snow and ice to reflect the suns rays much like sunglasses. I then imported images of Antarctica and Greenland with the pictureframe command and traced them with the control point curve traced map of Antarctica  traced map of Greenland  Here are the final outline I then extruded the curves to be implemented into the eyewear I then replaced the lenses of the glasses with the two ice covered land masses I then measured the smallest and largest widths of the nose bridge of my own glasses then implemented the measurements into the rhino sketch I then also translated th...